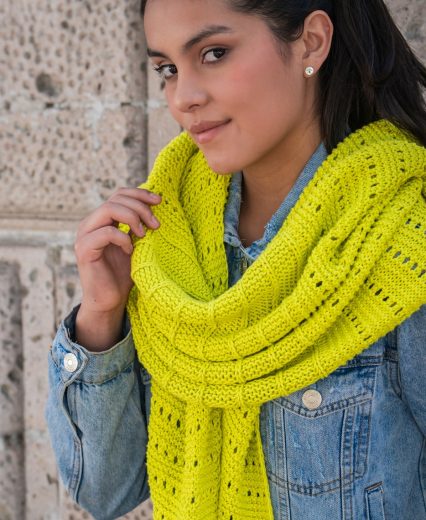


Have you finished binding off your first ever lace project in a lace weight yarn, only to find that it looks… kind of crumpled?
That’s because your project isn’t quite done yet! When knitting lace, it’s important to allow time for blocking. Most traditional lace patterns are knit using a fine or lace weight yarn worked on relatively larger needles. This creates the large, open stitches that form gossamer lace fabric. In their natural state, these stitches will want to pull in on themselves, creating a “crushed” appearance. Blocking is an essential step to open these stitches up and reveal the full beauty of the lace pattern you worked so hard to knit.
Here’s how we like to block lace projects knit in Joy, our lace weight alpaca yarn.
STEP 1: GIVE IT A GENTLE SOAK
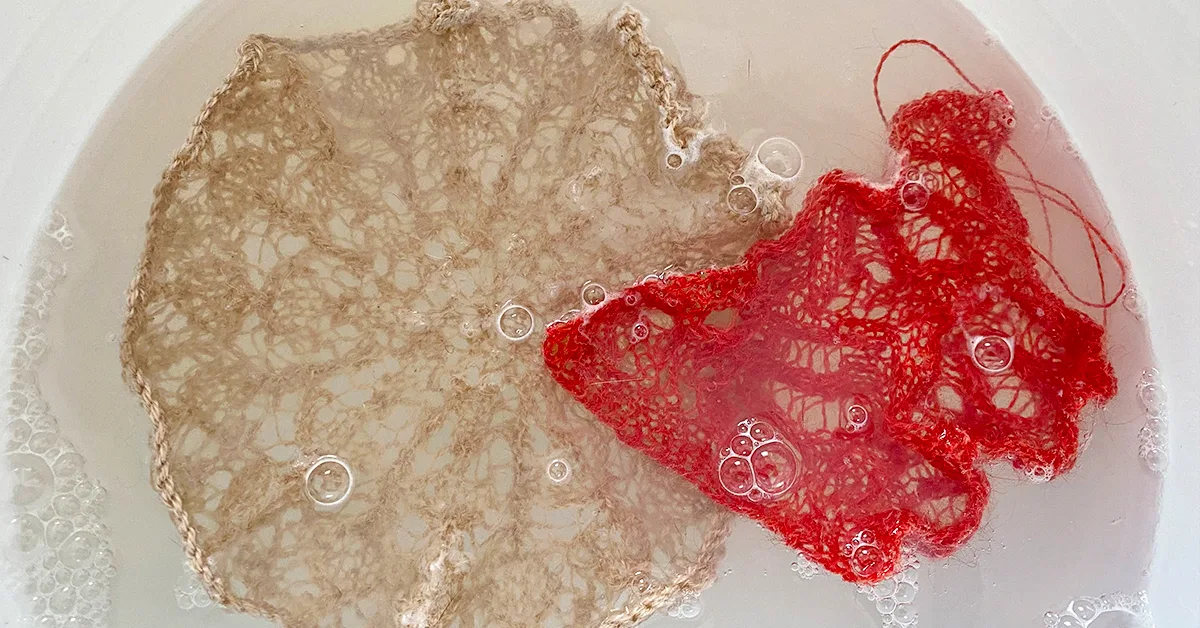
Finishing lace requires stretching and pinning it into place, but first, you’ll need to wet-block your project. This step lets the fibers to relax and bloom, which will allow them to be more pliable when the time comes to block out the shape.
To wet-block your project, fill a basin with tepid water and add a small amount of wool wash or castile soap. (Shampoo can also work in a pinch.) Completely submerge your project in the water and allow it to soak for 15 – 20 minutes. Soak it in one or two changes plain water to rinse.
STEP 2: SQUEEZE OUT AND DRY FLAT
Your lace project will be delicate when wet, especially if you’ve knitted it in a lace weight alpaca yarn like Joy. You’ll want to let it dry completely before you can start stretching it out. The lace design will already have started open up at this point, as you can see in the photo above.
To allow your project to air dry, first pull your project out of the water and gently squeeze it out.(Try to hold the entire piece in your hands to avoid letting your project stretch out. Do not wring the piece.) Next, lay it out over a towel and roll the towel up like a jelly roll, pressing as you roll to remove excess water. Finally, lay the project out to dry. (I like to dry my lace projects on my blocking boards so they’re ready to go for the final step.)
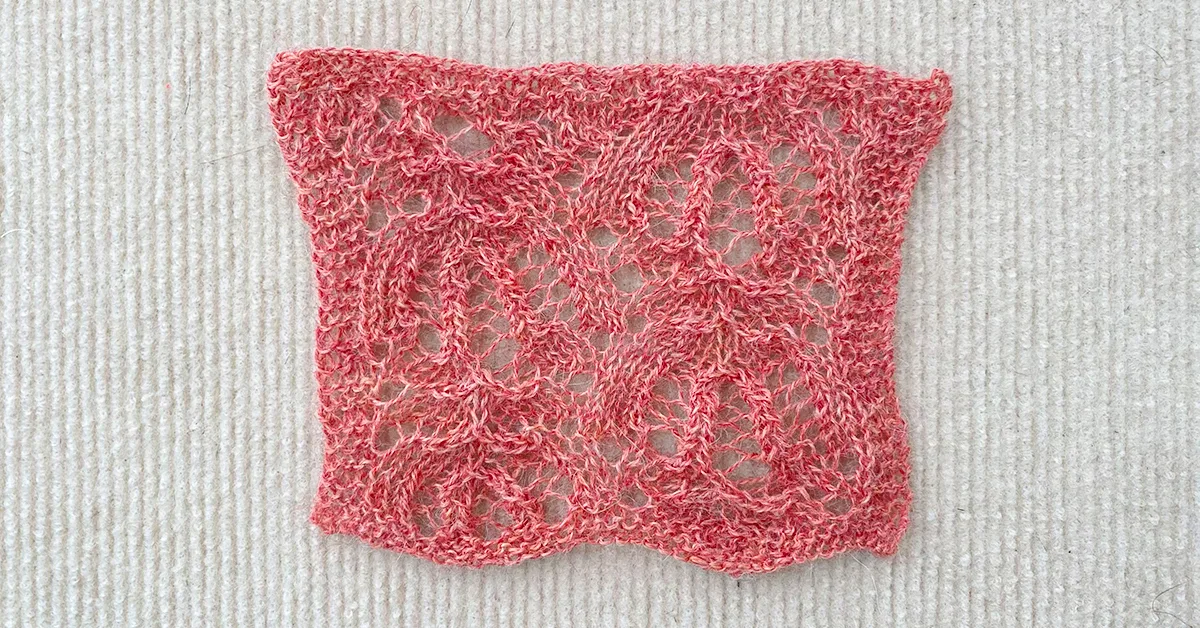
STEP 3: STRETCH AND STEAM
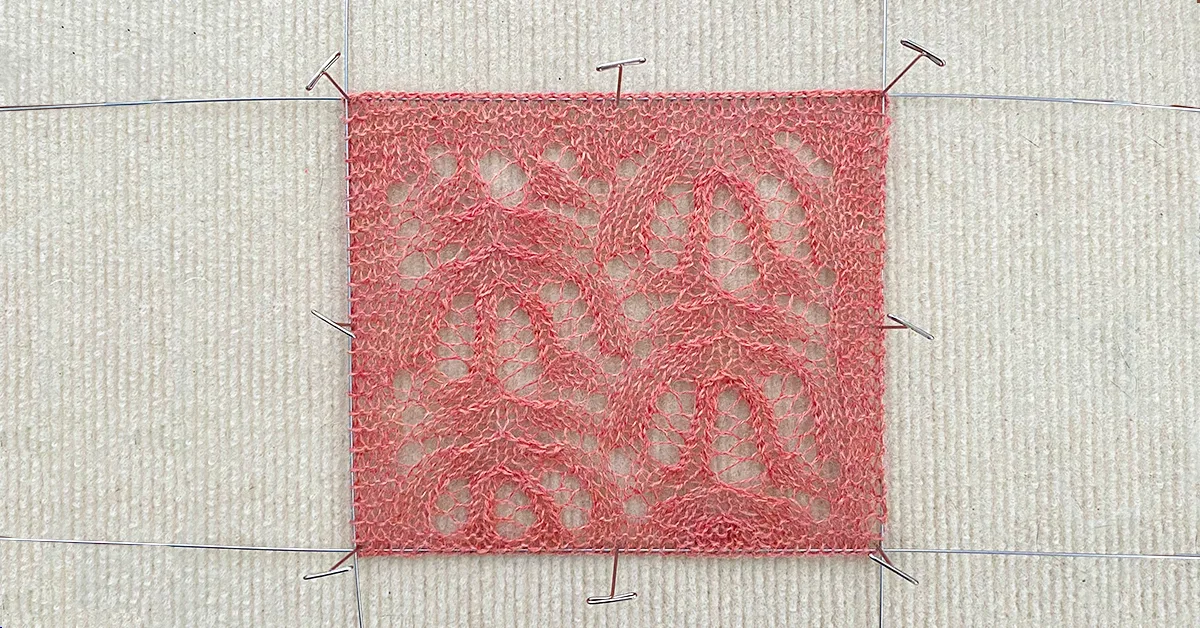
Now it’s finally time to stretch and steam-block your project! Stretching out the fabric will unveil the lace pattern, and steaming it will lock the pattern into place. To complete this step, you’ll need pins and blocking boards (or a padded, sturdy surface you can insert your pins into.) Blocking wires are optional, but they go a long way to shape straight edges and help maintain an even tension throughout your fabric.
Start by threading your wires, if using, evenly into the fabric’s edge. Working from the edges, slowly spread the fabric out in all directions, using pins to hold the edges in place. Continue to work around the piece, stretching out the fabric as far as it can comfortably go. (You may need to adjust the placement of the pins as the fabric continues to stretch.) Once you’ve finished shaping your project, use an iron on the highest steam setting to steam the fabric. Allow the project to dry fully before removing the wires and pins.
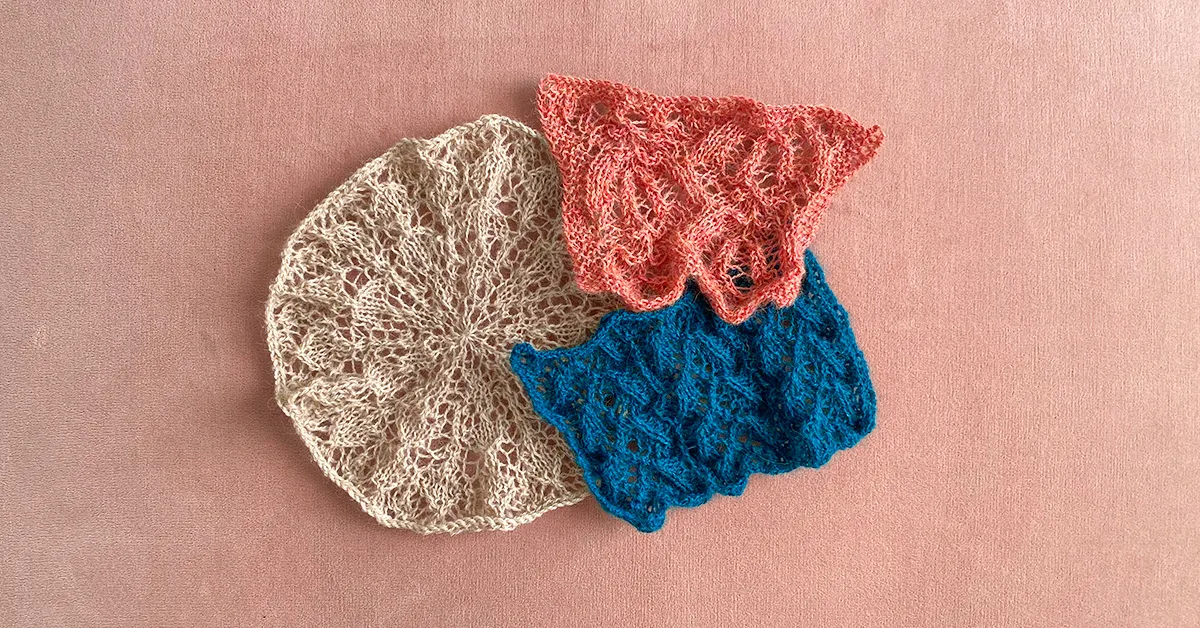
BEFORE AND AFTER
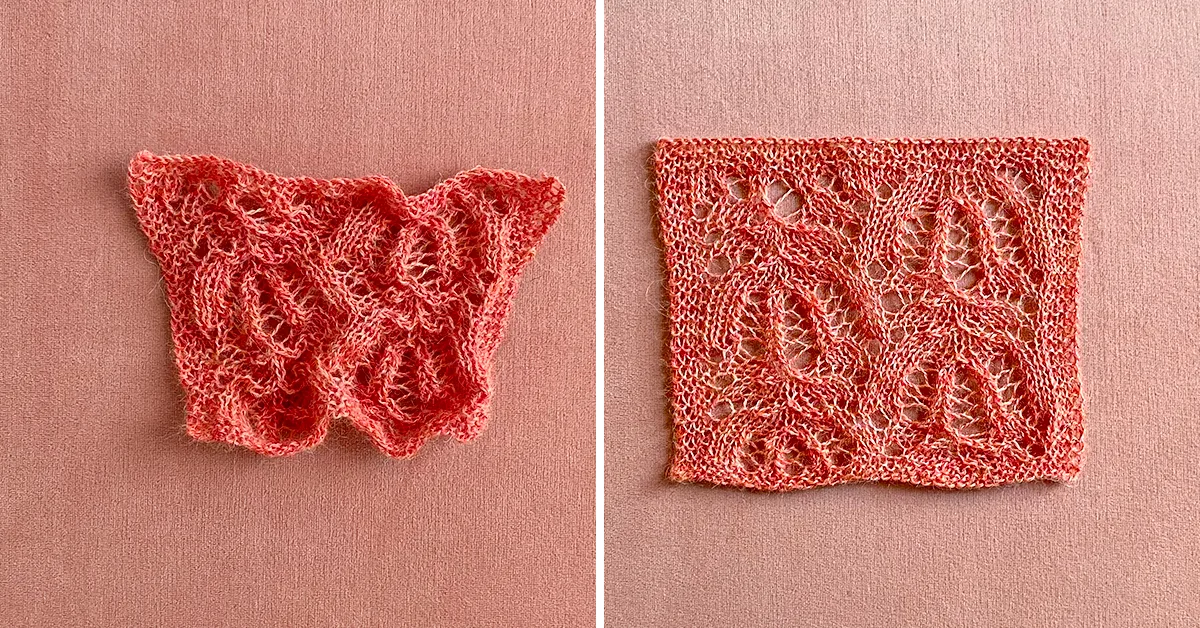
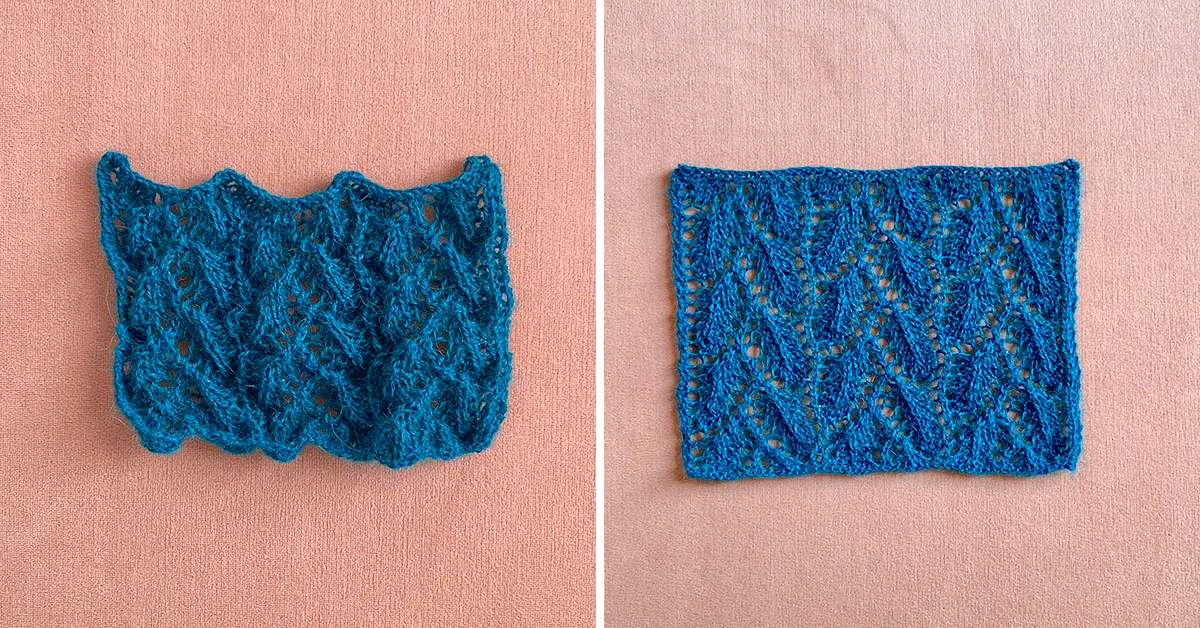
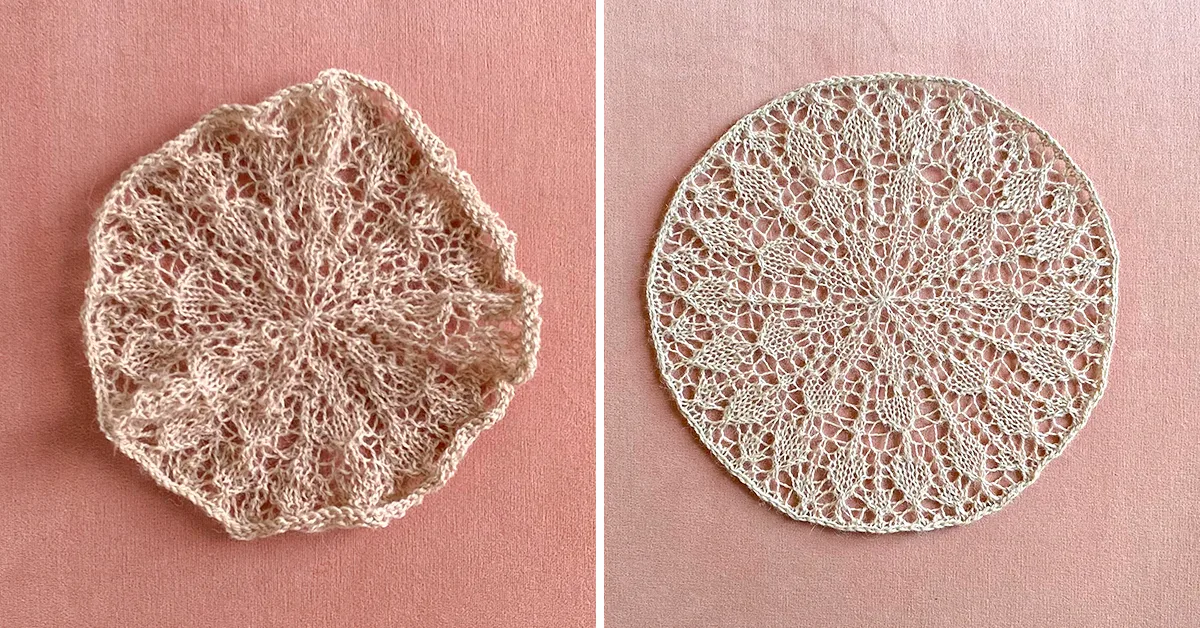
These photos show the difference that blocking makes. The swatches on the right are almost unrecognizable after they go through the finishing process!
Are you knitting any summer lace projects with Joy? You can always reach out to us at hello@yarnalia.com with any questions about lace knitting, blocking, or anything else you’re working on.